Any designer, regardless of his skills, is faced with a situation where you need to remove the background of the image, leaving intact the desired object. And while simple objects are more or less successful, complex ones pose a real problem for the designer.
But before I show you some great ways to remove the background in Photoshop, it’s probably worth clarifying some points. For example, what is a complex object? For me, complex is anything that can’t be cut out with the Pen Tool. This category includes hair, hair, grass, leaves, clouds, and so on. It is precisely for the extraction of such objects that today’s lesson is created.
Method One: Using Channels
Remove the background with channels is probably one of the most effective, fastest and popular ways IF the background is homogeneous. For example, white.
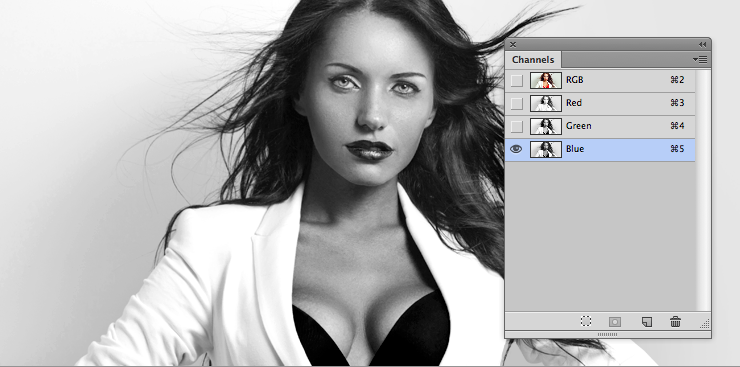
For example, let’s take a photo of a charming girl.

Go to the Channels tab (you can add it through the Window menu) and choose the channel that makes the object the most contrasting in relation to the background. In this case, it is blue.
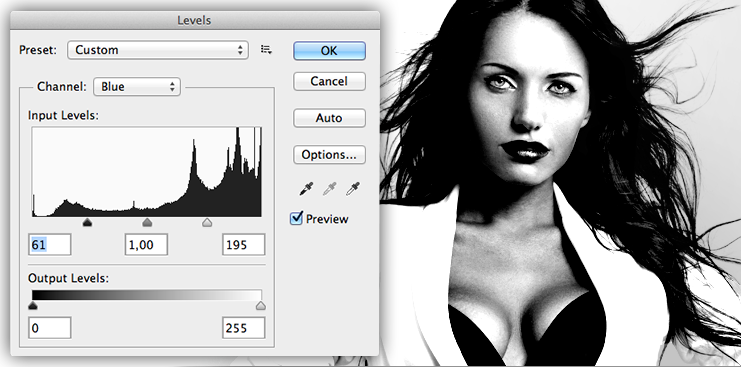
Duplicate it. CTRL+J does not work, so right-click and select duplicate channel. Disable all channels except the duplicate channel. Next, press CTRL+L and adjust the sliders so that there is maximum contrast between the background and the edges of the object.
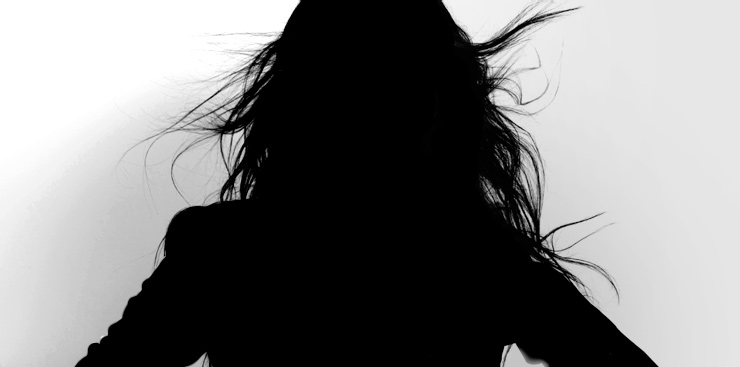
Perfect. Now select the brush tool and paint the object in black. Like this:
The simplest thing is left. Hold down CTRL and click on the duplicate channel icon in the channels panel to create a selection. Then turn on all the previously turned off channels, and delete the duplicate channel. It is very important to keep the RGB channel selected. Without removing the selection, go to the layers tab and press Delete. That is all.
If the background is not homogeneous, you’ll have to do a lot of work. Let’s look at the following method.
Method two: Using Refine Edge
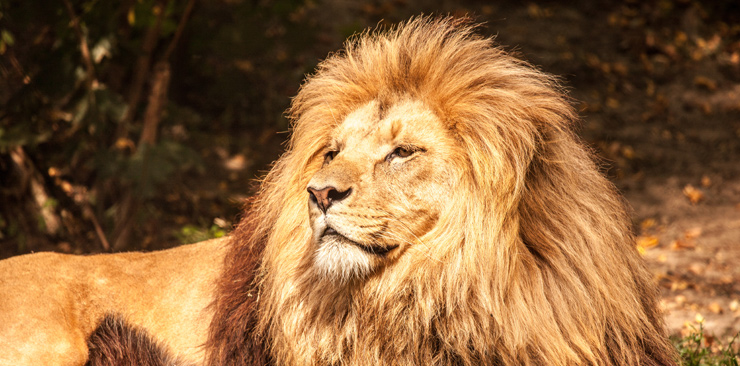
This function appeared in Photoshop quite a long time ago. The function is called Exact Edge. It allows you to remove a complex background from a complex object as well as it can be done automatically. I suggest that you practice on cats, literally.
Using whatever tool is convenient for you, create a rough selection like this…
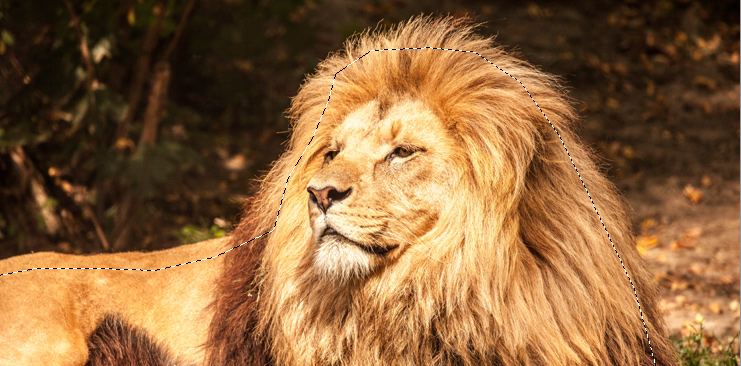
… and go to Select – Refine Edge.
There are no exact settings. It depends solely on your image. By trial and error, I got about the following:
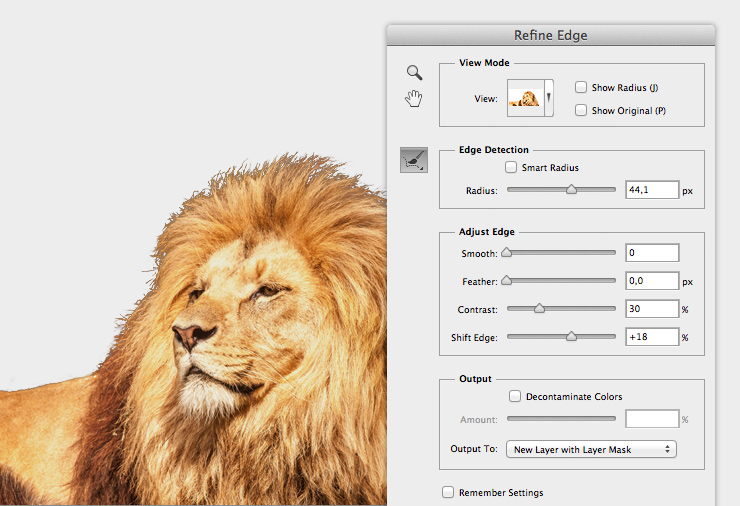
Of course, the result is not perfect, and it can’t be. You’ll have to use a brush to work a little trickery. But it will take much less time than carving the lion by hand. There is no other, more effective way to remove a complicated background. That is probably all.
To conclude
I hope you will find this tutorial useful. In any case, the methods described today, I use constantly when I make banners or collages. Maybe you know other ways to get rid of the background?