Most of you have probably heard about the new Sketch 3. It is positioned as a great analog to Photoshop for UI designers, but that’s not quite true. In fact, Sketch is easier than Photoshop, faster than Photoshop, and overall, much better for designing and rendering interfaces.

It won’t take you more than 2-3 days to migrate to Sketch and figure out the ins and outs of how it works. Let me give you the basics.
Brief information
Let’s start with the fact that Sketch is very light and takes up only 46 MB of disk space, compared to Photoshop’s 1.6 GB. It is based on a dimensionless workspace, so all the layouts are not in separate PSDs scattered here and there, but in a single document. And even if it happens that you suddenly do not have enough dimensionless space :), just create a new page in the same document and dimensionless spaces you will have two.
To separate layouts from each other Sketch uses the artboard technique. Each artboard can have absolutely any size and move around the page in any direction. Artboards can be copied, duplicated, named, and exported individually or all together.
First launch
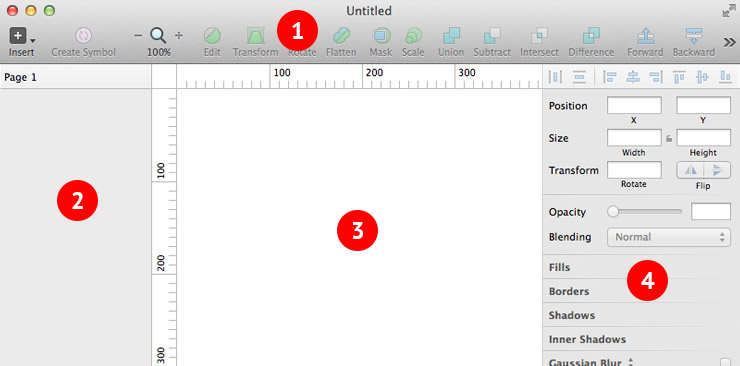
The program interface consists of 4 main areas.
- Toolbar and Actions Panel
- Layers Panel
- Workspace
- Formatting Panel
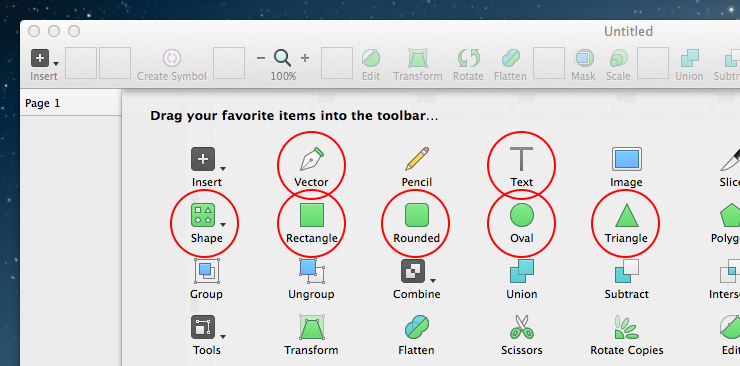
First, we need to do some customization of the toolbar and add additional hotkeys. Right-click on the toolbar and choose Customize Toolbar.
It opens a window with all the tools available to us, which you can transfer to the panel. In principle, it is enough to transfer only primitives, pen and text.
It is also worth adding additional hotkeys, which for some reason are missing by default. For example, show/hide guides.
This is done not in the program, but in the system settings. Go to the System Settings – Keyboard – Key Combinations. At the bottom of the list select the Program Key Combination, press +, set the following parameters and click Add.
- Program: Sketch
- Menu name: Show Smart Guides
- Key combination: Cmd+;
Then press the + button again and set other parameters:
- Program: Sketch
- Menu name: Hide Smart Guides
- Key combination: Cmd+;
Great, now with Cmd+; we can show/hide the guides, just like in Photoshop.
Let’s return to our tools. There’s not much point in describing how each one works. They are simple and intuitive. I will only tell you about some of them.
Symbols
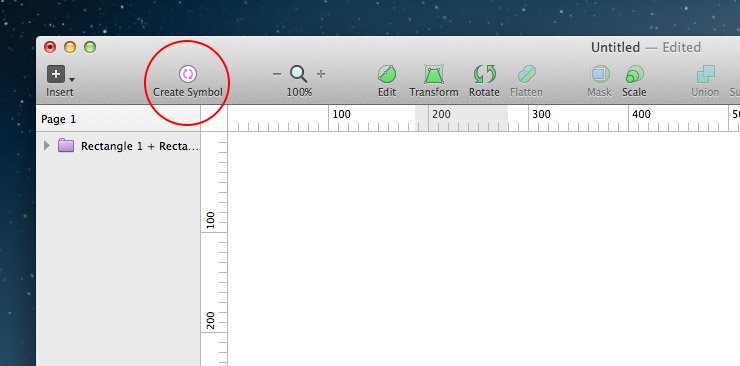
A symbol is something between a folder and a smart object. Symbols can be named and duplicated an infinite number of times, as well as any elements included in the symbol can be edited in real time. When editing a symbol, all its duplicates are edited. Be careful, this is very difficult to get used to at first. To turn a symbol into a simple folder, you need to select No Symbol in the formatting panel in the drop-down list of available symbols.
Modular grid
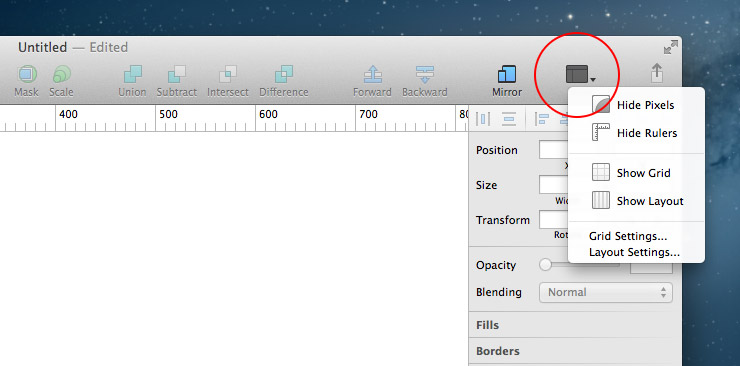
It doesn’t require an external download, unlike Photoshop. It can be created and customized for absolutely any artboard.
You’ll get to know all the other tools on your own. It’s time to move on.
Layers panel
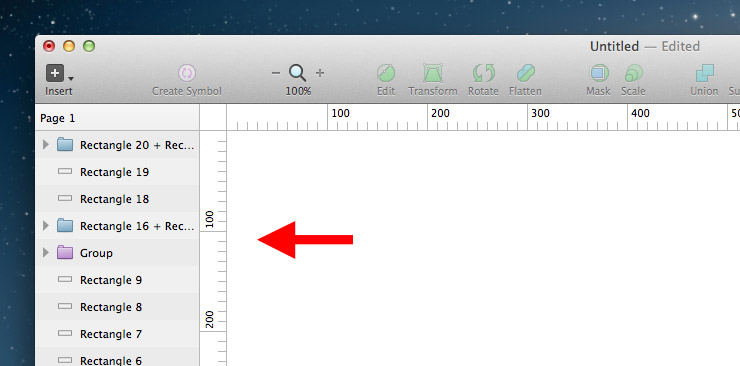
Always located on the left side of the program and cannot be moved to another location. It contains layers, folders and symbols. The folders are marked in blue, the symbols in pink. The working principle of this panel is very similar to that of Photoshop.
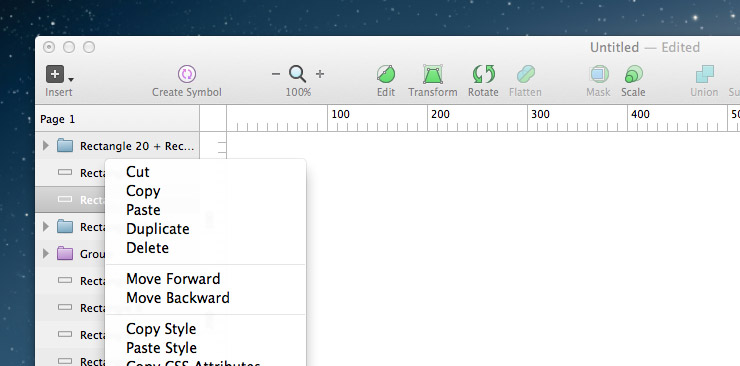
The context menu allows you to do some operations with objects, such as: copy CSS styles, duplicate, convert, delete, twist and turn them.
Different types of objects have different settings in the formatting panel.
Formatting panel
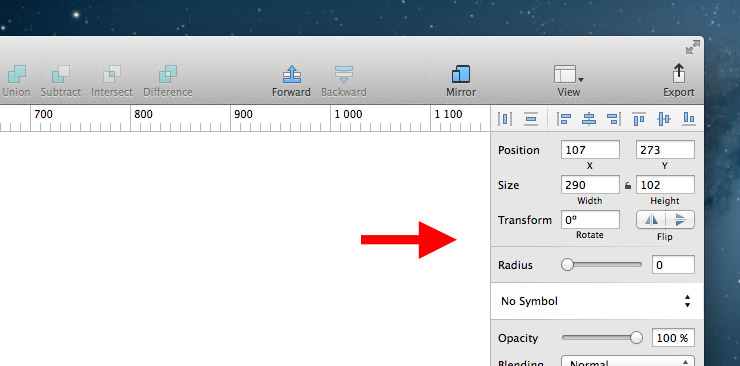
Always located on the right side of the program and cannot be moved to another location. Displays most of the settings that can be made with the selected object. Add shadow, transparency, select color, or resize – all of these can be done in the formatting panel.
The possibilities are largely similar to Photoshop’s, so there is not much difficulty with it.
By the way, the format panel has a very interesting feature. You can add the same property to an object an infinite number of times. For example, a shadow:
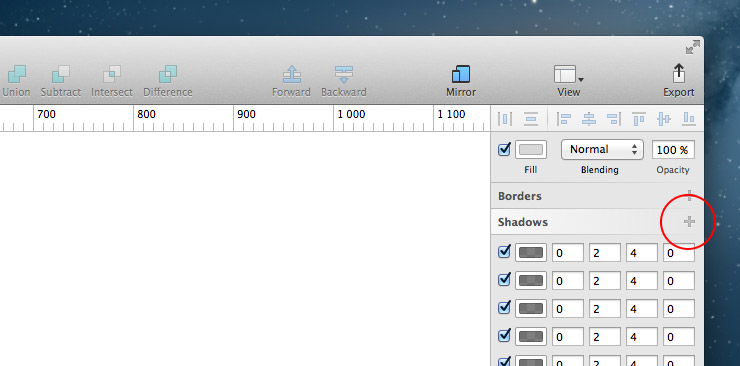
In Photoshop, I had to mimic one property with another.
Workspace
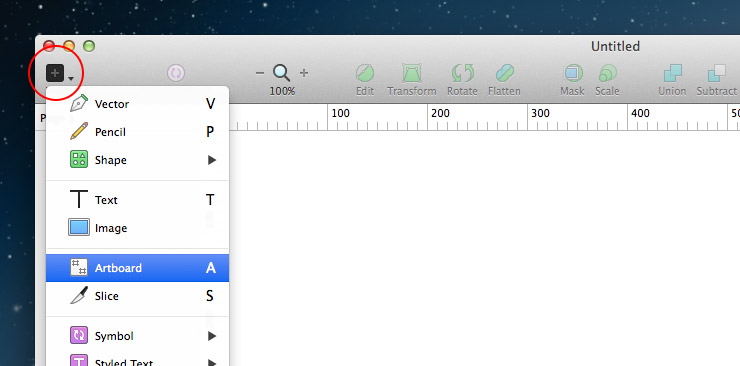
As I said before, it is dimensionless. Artboards are used to separate layouts. You can create an artboard using the toolbar or by pressing the hotkey A.
I don’t think there will be any difficulties with this point, so we won’t dwell on it in detail.
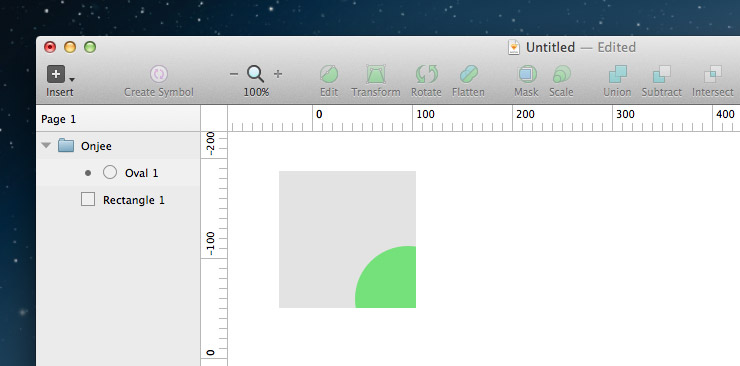
However, it is worth mentioning that the object included in the artboard – will remain as such, even if part of the object is outside of it. To understand what we are talking about, I suggest to look at the screenshot below.
Other useful features worth knowing about
Export
Exporting objects in Sketch is very simple and can be done in different ways. For example, you can select an artboard and from the format panel transfer its thumbnail to the desktop, or any other location on the disk – the file will be saved in PNG format.
Or you can select a layer in the Layers panel and move it to the desktop.
Given the peculiarities of the program when exporting objects, you can set them to 2x size and Sketch will automatically increase the resolution of the exported files by 2 times.
Autosave and version control
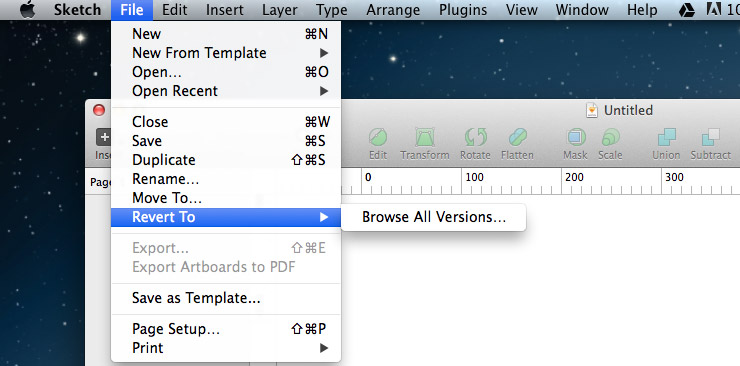
You no longer need to worry about saving files. The sketch automatically saves all changes you make. Moreover, you can easily load any version of the selected file, starting from the time of its creation and up to the current moment. To do this, go to File – Revert to – Browse all version.
Templates
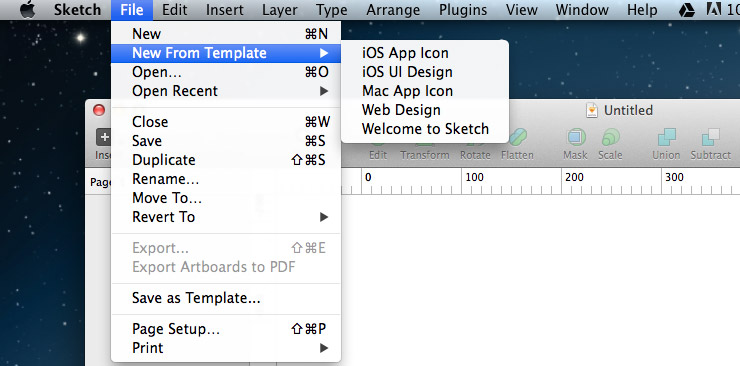
You can use templates to simplify and speed up mobile app development. All currently available templates can be found in the File menu.
Copying text without attributes
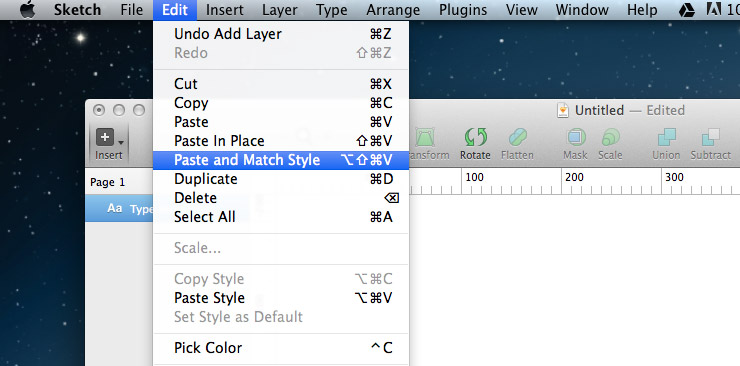
By default, Sketch copies the text with all the attributes added to it. To avoid this, copy the text and then paste it into the desired location using Edit – Paste and Match Style.
Creating a mask
A mask in Sketch doesn’t work exactly the way it does in Photoshop. Its principle is rather similar to that of Illustrator. If we want to create a mask, we do the following. We create two objects and merge them into a folder. In the Layers panel, right-click on the bottom object and choose Use as Mask.
Any of the objects in the folder can be made to ignore the mask. To do this, right-click on it and select Ignore Underlying Mask.
CSS properties
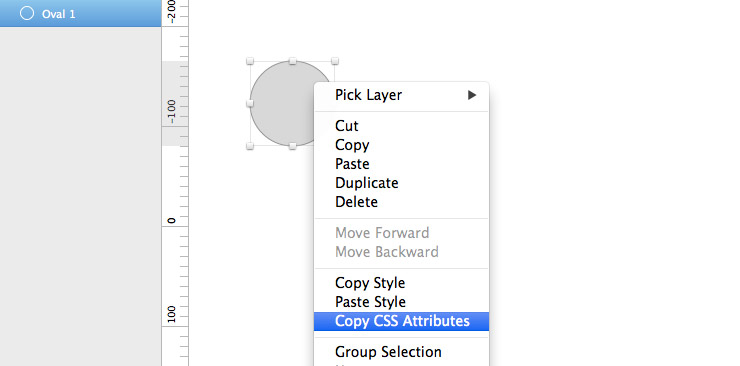
The sketch allows you to copy the CSS properties of any objects you create and paste the code directly into the HTML editor.
Multipage
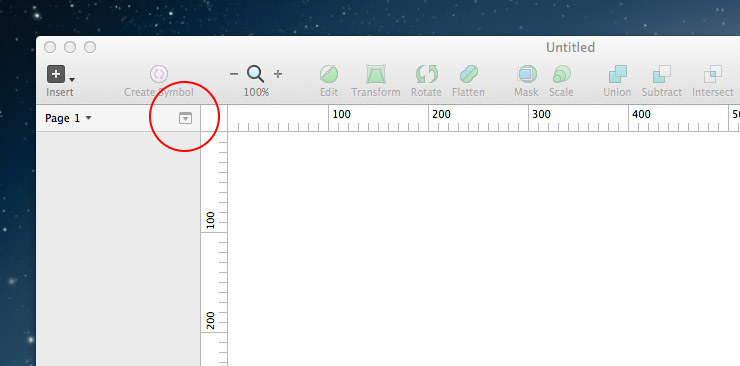
You can create as many pages as you want. To see the list of already created pages, or to add new ones, go to the Layers panel and click the triangle in the upper right corner.
Editing vector objects
Working with a vector in Sketch is a bit different from Photoshop. It takes time to get used to it. To go to the vector editing section you need to select the vector object and press Enter.
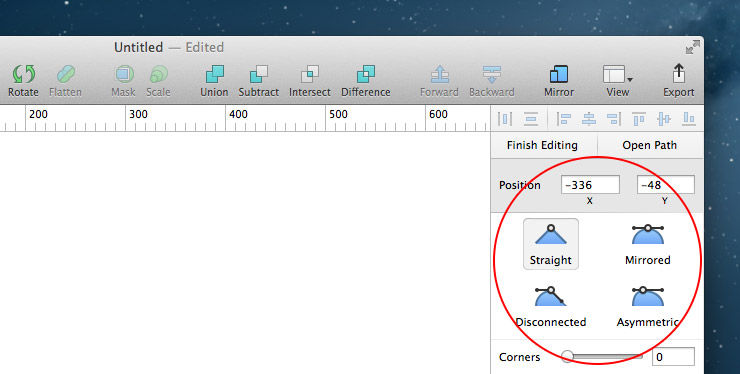
There are not many settings. You can choose methods of working with points, as well as set their radius of rounding.
In conclusion
Sketch has become an indispensable assistant for the UI designer. It does not require special training and tedious study of millions of properties and settings.
Creating interfaces in it is great fun. You concentrate not on how you do it, but on what you do. The result exceeds all expectations.